Most Popular Pet Names
I’ve been a dog walker / pet sitter for over 10 years so I think I have a decent sample size for determining common pet names.
I’ve been a dog walker / pet sitter for over 10 years so I think I have a decent sample size for determining common pet names.
Here’s a bit about me that you might not know: I am a fan of The Bachelor franchise. Don’t judge. :) I am particularly a fan of Nick Viall and recently on twitter he listed the Top 5 names for male dogs: https://twitter.com/viallnicholas28/status/1179810447865741312
So if you like this blog post, you have Nick to thank.
He listed: Steve, Jeff, Howard, Craig and Phil as the Top 5. The post isn’t clear to me but perhaps he is thinking of getting a dog? If so, I’d love to be his dog photographer!!
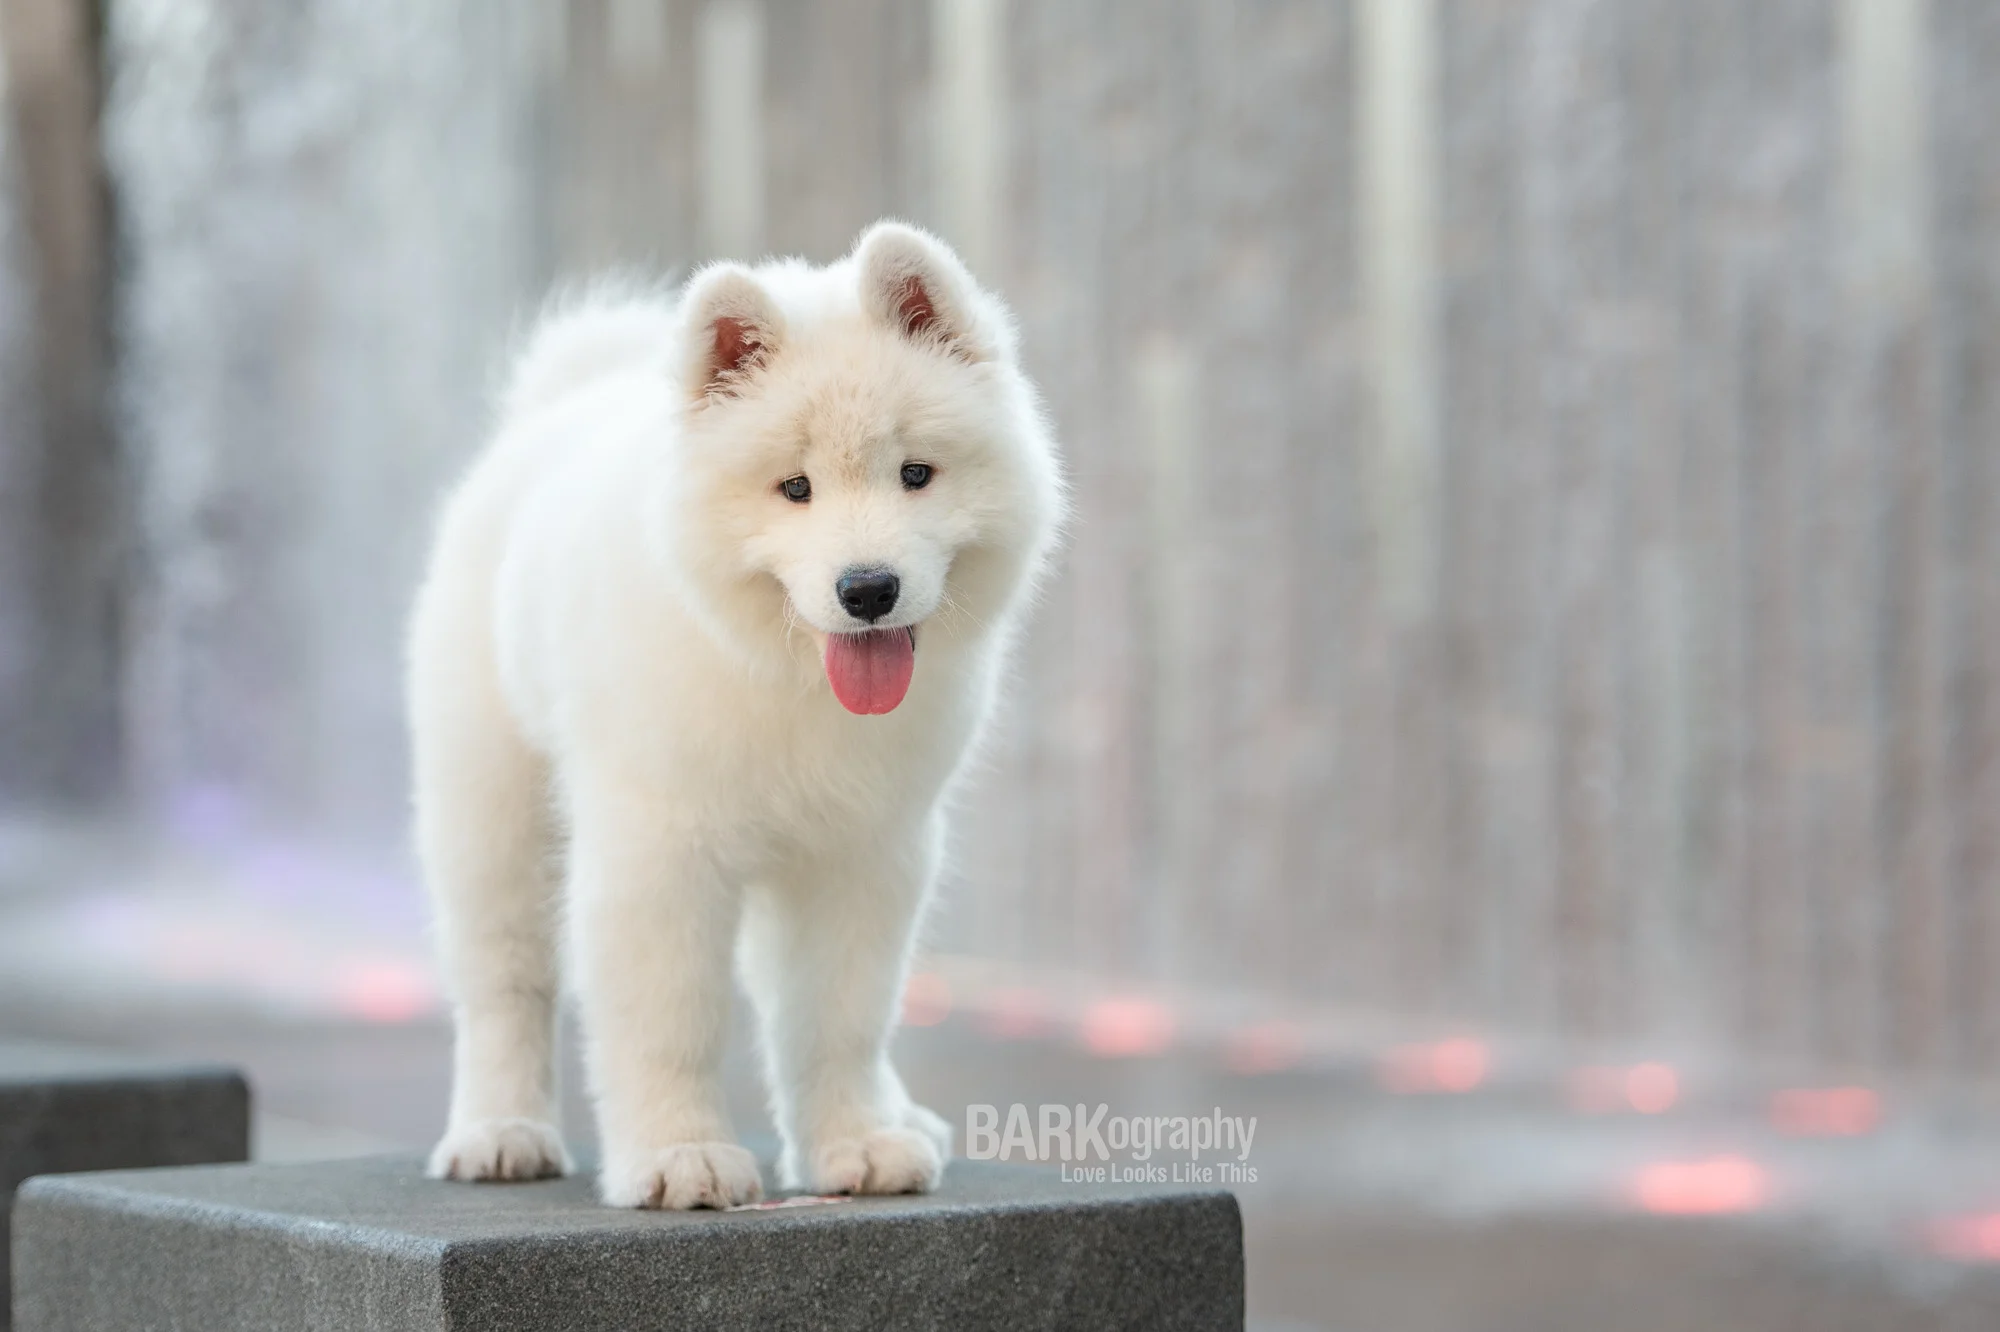
I do actually know a dog named Steve. He’s an adorable cockapoo. The samoyed puppy pictured above is named Kevin.
However the most common dog names I’ve run across in Charlotte are: Molly, Maggie, Sam, Lulu, Bella, Louis, and Winston. I think I’ve met more Molly’s and Maggie’s than any other names.
I have a Molly. We adopted her at the age of 5 and she came with her name. She has lots of nicknames too.
Pet Photography Project 52, week 28: White Balance for Mood
For week 28 of our pet photography challenge, we are talking about white balance and specifically how we can play with it to create a different mood in our images. This is where being create comes into play and I just don't feel like I am "there" yet with my photography. I spend all of my efforts trying to create a visually correct image and that includes trying to get the white balance correct. White balance in an image is the process of creating correct color balance in a photo so whites are white. Creating correct color balance generally means the neutral tones in the scene are rendered neutral in the photograph, without a color cast. If you take cell phone photos (or photos with a camera for that matter), look at them now and answer this question: do the whites look white? Do they look pink, green, yellow or blue? If they do that's common because getting the white balance correct is hard. I just scrolled through my cell phone pics and I learned 2 things: I don't take very many cell phone photos and when I do, they are either yellow or pink.


There are tools to use in Lightroom and Photoshop to adjust these but as my instructor Nicole Begley of Nicole Begley Photography said at Barkelona, just use a gray card before taking your shots. Then you'll know you have the correct white balance. How many times do I forget to use my gray card..... ?? I won't answer that. :)
So the above photos don't work when I try to adjust the white balance and create a mood so I set out to do that. This is definitely outside of the box for me and outside of my comfort zone. I just don't feel like I have the experience under my belt yet to be super creative with my photography but part of the reason I'm doing these challenges weekly is to step outside the box.
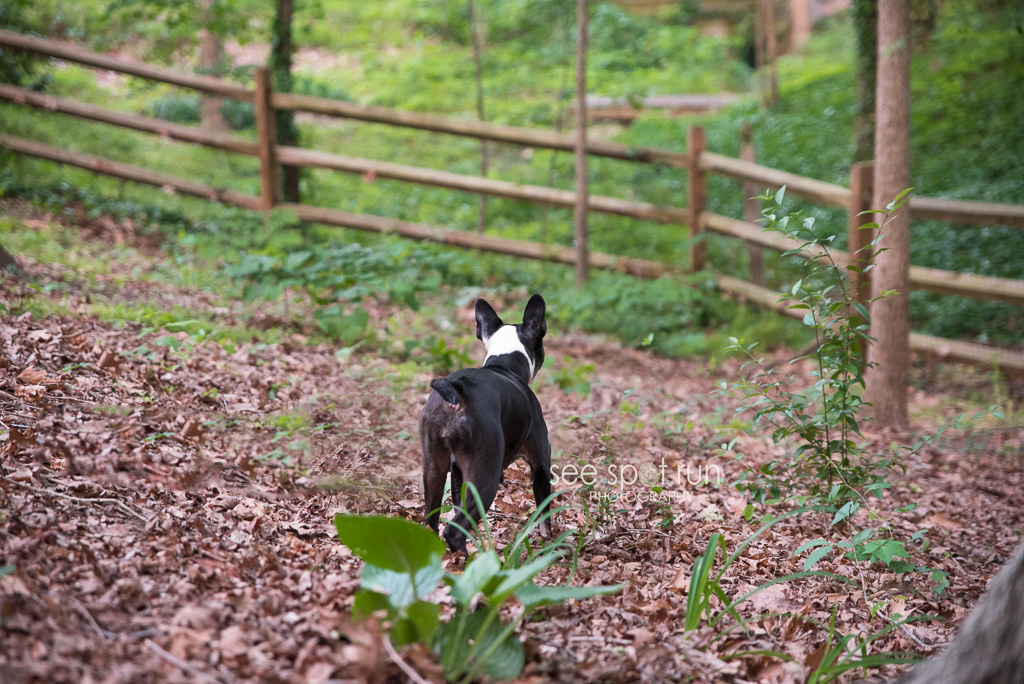
My first dilemma was this: should I keep the camera on auto white balance? Since my subject is a dog, if I adjust the white balance for the entire scene, the dog is going to end up blue, yellow, green or pink and I can't think of a scenario when that works. Below I've used a photo with auto WB and then in Lightroom I adjusted for blue and yellow white balance.


This is a blog circle to next up is Pet Love Photography, serving Greater Cincinnati and the San Francisco Bay area . Keep clicking the link at the end of each post and you'll end up right back here.
Project 52 Week 19: Patterns
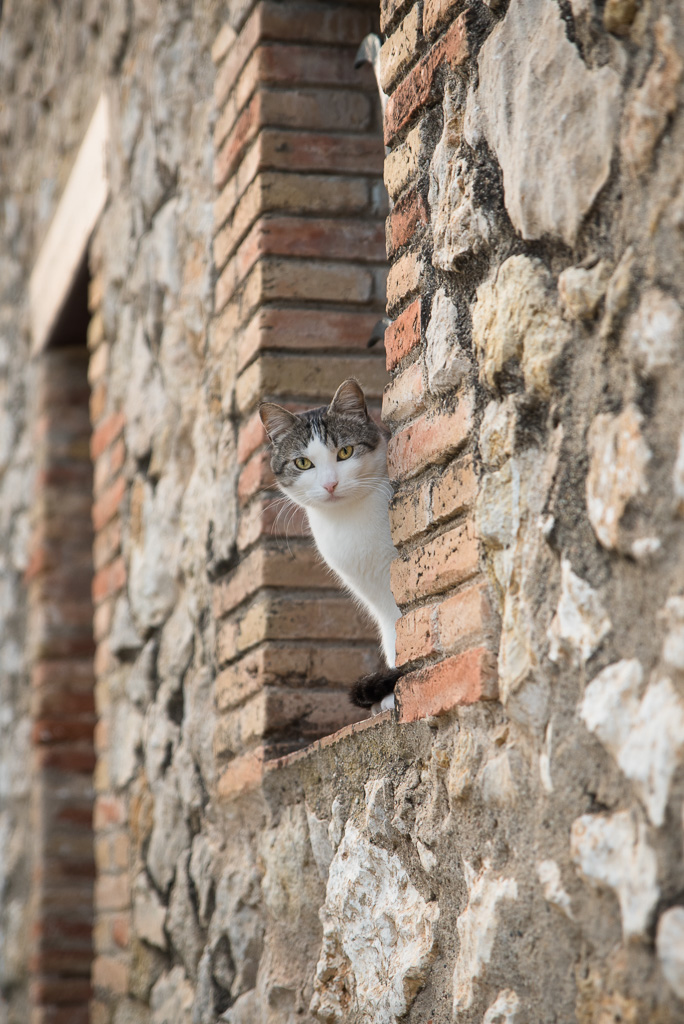
This week we are continuing our study of lines and specifically patterns this week. In our workbook, this phrase in particular stood out to me: "The stronger the pattern, the stronger the expectation that the pattern will continue to repeat, and when it doesn't, that contrast has great visual mass and will captivate our attention." When I was in Spain, one of the photographers took several amazing photos of a dog standing in between some stone columns. That visual is exactly what comes to mind when I read about this exercise. I am hoping she will participate this week and use that photo (I may have hinted to her that she needs too!) It is one of my favorite photos that anyone of us took in Spain. In our workbook for this week, one of the photos used as an example was taken in Africa on a safari. It was a landscape image with antelope and a Land Rover creating a pattern with eye being drawn to the antelope. My take on this week's assignment is similar since I couldn't find any stone columns and a dog that would hold a sit/stay for me. :(
Let me set the stage.
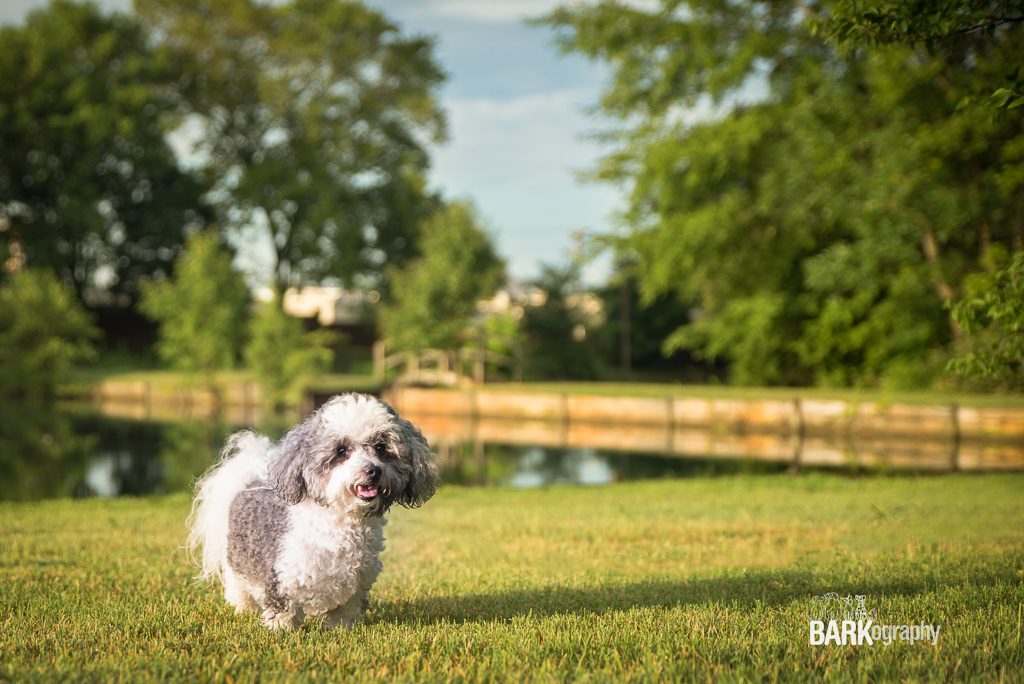
I was pet sitting with this cutie Millie and her canine sister Sadie. Millie was rescued as a puppy from a bad breeding situation and now 5 years later to say her life is better is an understatement. Just look at this yard AND her frequent guests that keep her (and me!) entertained.
I'd grabbed my camera before heading over to her house knowing that I was loosing light quickly. I wish I would've had my long lens but I didn't so I made do with my 24-70. I cranked up my ISO and was at f/8 to try and capture the entire scene in focus. To say Millie is a ball of energy is an understatement. If you sit down or crouch down (to take a photo), you need to know where Millie is because she will be on you in a heartbeat and loves to smother you in as many kisses as she can. She may hold the record for most kisses given in under a minute! I am not kidding!! In low light at f/8 and a high ISO, if Millie moved at all, she wasn't going to be sharp. In the first image she isn't but I've included it because this was my first indication that something was going on....
This was mine and Millie's view last night. And yes, my view of Millie was pretty much of her hind end the entire time!


This is a blog circle so next up is Northeast PA Pet Photographer, Elaine Tweedy. Be sure to click the link at the bottom of each post to see each photographer's interpretation on this week's assignment.
Barkelona Day 2: Second Photo Shoot with Forca
I met Forca during our 2nd photo shoot on day 2. After another incredible meal at Casa Felix, we were introduced to 3 more sets of dogs that we would be photographing outdoors, around Casa Felix just before sunset. I can't even describe how beautiful it was around our villa. Some of my favorite photos from my time in Spain were taken during this photo shoot. Because of that, I'm going to walk you through each individual photo shoot. My group started with Forca. She is a beautiful chocolate lab. This is literally the first photo I took of her.
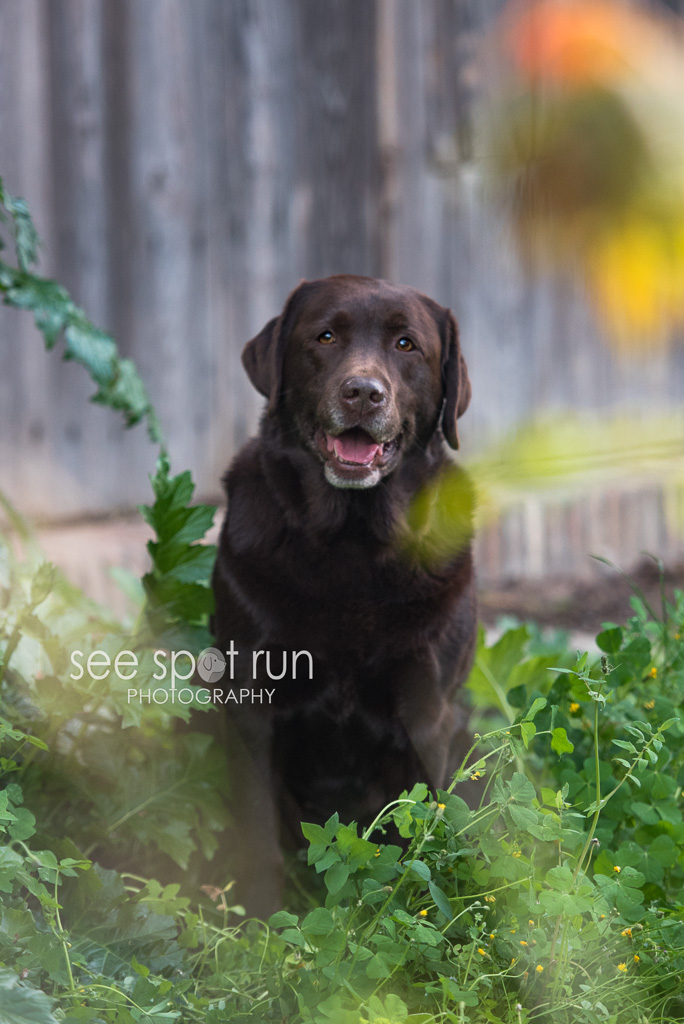
She is a trained therapy dog and was so calm. Her parents were with her and her mom spoke a little English. You know when you meet certain people and you just like them? That's how I felt about Forca's mom. You could tell she just adored this dog.
As many of you know, I have a chocolate lab named Moose that we rescued 1.5 years ago at the age of 8. Forca made me miss my man Moose although my guy has a much different personality because he wouldn't sit and pose like Forca did for us. She was a great dog and I hated saying goodbye to them.


I love profile shots of dogs. I have two 20x24 photos of my dogs Willow and Buddy hanging in my bedroom are both are profile shots of them that I had taken by a professional photographer back in 2012 before I'd ever even thought of becoming a photographer myself. I like profile shots when the dogs are captured looking up as Forca is in this one. I can see the love and adoration she has in her eyes as she is staring up at her mom. This is my personal favorite image that I took of Forca. I just love it because I know she is looking at her mom and that look in her eye and the happiness in her face just gets me every time.
Using a Slower Shutter Speed & Panning: Project 52 week 7 and 8
This week we combined the week 7 and week 8 challenges for Project 52: using a slow shutter speed and panning so I started with using a slower speed which I knew would be the easier of the two for me. Generally if you are trying to stop action in your image and you don't want your image to be blurry, you want your shutter speed to be at 1/250 or faster. Our instructions this week said to start with a shutter speed of 1/60. When using a slower shutter speed like 1/60, you are going to have some blur in your image. The trick was to create an image when this blur looks creative and not like a mistake. Well, my results are below and let me just state other than for the sake of this exercise, this isn't an image I would normally post online for everyone to see because its not very artsy looking. One of my biggest takeaways from this week's challenge was this information I got from the Photo Nuts & Shots ebook by photographer Neil Creek. In the book, he writes: "It may seem like your camera is capturing an instant in time, but in reality it’s capturing a duration of time equal to your shutter speed. This becomes critical to the image sharpness when there is movement during the exposure. This movement can be of the subject – referred to as ‘motion blur’, or of the camera itself – referred to as ‘camera shake’. One distinguishing feature of camera shake, when compared with motion blur, is that it affects the whole image. When a subject moves, only the moving parts appear blurred, but if the camera moves, the whole sensor moves relative to the subject."
I at least now understand the difference between motion blur and camera shake and I was able to accomplish motion blur in my image.
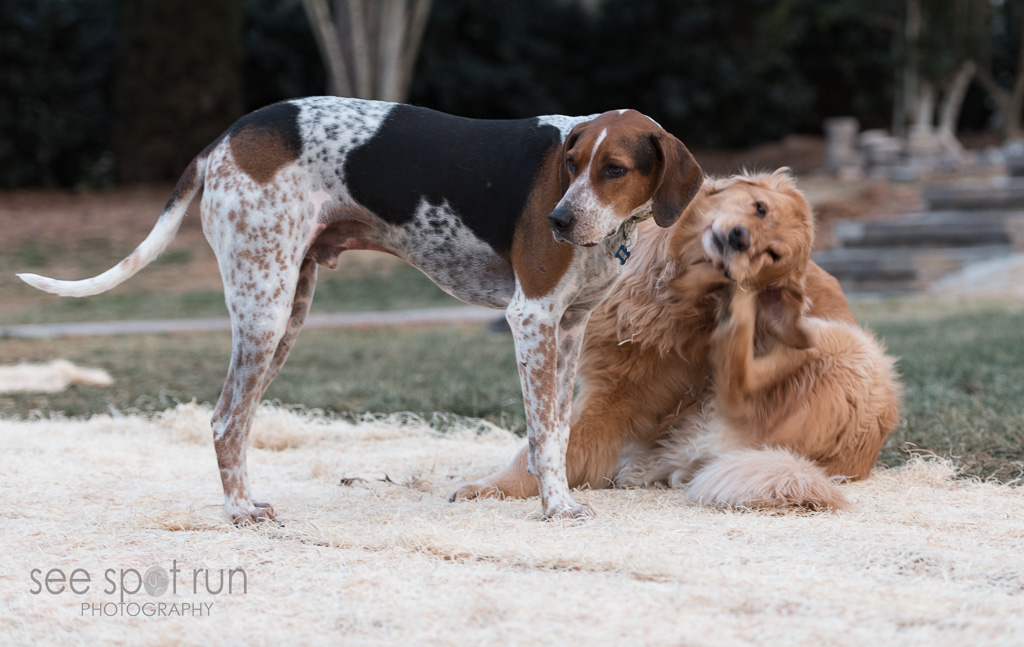
My models this week were Ollie (hound) and Sunny (retriever.) This shot was taken with a shutter speed of 1/30 (f/2.8 and ISO 100.) You can see that Ollie is sharper than Sunny. Sunny is moving faster than Ollie since he is scratching and he is also behind Ollie in the image which I believe would also impact why Ollie is sharper than Sunny.
The next part of the challenge was panning. Once you master using a slower shutter speed, the instructions said that panning would be easier. I need more work on using a slower shutter speed so my attempts at panning were laughable. Here is my takeaway from this part of the exercise: I should start with a subject that is moving predictably like cars or kids on bicycles. I might have a little more success. :)
Next up in the blog circle is Northeastern PA Pet Photographer, I Got The Shot Photography. Be sure to click the links at the bottom of each post. I am certain the others had better success with the challenge this week than I did!
Project 52 - week 5
If this is your first time to my blog, welcome! I have joined a facebook pet photography group that challenges its members to blog and post pictures about weekly topics. This is my first week participating although technically the group is in week 5. The group is called Project 52 and this week's challenge is "Optimize your RAW Exposures." At the end of this post is a link to the next photographer participating in the Project 52 challenge. Be sure to click the link and read their interpretation of this week's assignment. Since I probably have some new readers who don't know me here is a quick blurb about me. My name is Kim and I started a dog walking and pet sitting company in 2008. (My 7 year anniversary is April 4. It'll be 7 years!!!) I started the dog walking business because I have always loved dogs. The photography didn't come in until 6 years later. I have always enjoyed taking pictures but I never really thought about it much more than that, until 2014. In 2014, our black lab Buddy's health was failing. I knew I didn't want to make the mistake with him that I'd made with my two previous labs, Sloan and Sam. One of my biggest regrets is not having great (really GREAT) images of them. I have tons of pictures of them but none are very good. So, in August 2014 I bought a Nikon. Buddy died 5 weeks later but the images I took of him I will treasure forever. A year and a half later I really realize how much I didn't know at the time I was taking those photos of Buddy. Someone was looking out for me because a couple of them are actually okay. And that is how See Spot Run Photography was born.
So back to Project 52 - week 5. Here is this week's challenge from this newbie's* perspective and here are the instructions I was given: For this week, turn the "blinkies" on (Highlight Warnings or something similar in your camera menu). Since we're shooting in RAW, don't use the LCD to judge your exposure, because it's reading the camera's JPG. Use the histogram for taking your images and try to keep the exposure as far right as you can. You'll adjust the color and exposure in your post-processing.
Let me just say, that I am proud that I actually knew what this meant. (Now knowing what this meant and translating it to an image are two totally different things as I discovered and you will too if you keep reading!) Someone a long time ago must've told me about the blinkies and the histogram because I look at them a lot. Blinkies are on the LCD screen on the back of the camera and they flash when the whites in your image are too bright. The flashing is generally not a good thing - it means you need to make some adjustments on the camera to tone them down. (I am sure if I go back and read this down the road I will be completely embarrassed that this is my explanation for flashing highlights!) To keep the exposure as far to the right as possible, that means when I look at the histogram on the back of my camera, all of the mountains (data) should be on the right side.
Below is an example of what a histogram in Lightroom looks like. I couldn't figure out how to copy the histogram for one of my photos but this is basically what I was trying to achieve. I wanted to take a picture and I wanted the histogram data (mountains) to look similar to this one, with the data mainly on the right side. If you are looking at the histogram, the far left side is black and the far right is white so it goes from dark to light. Since the project 52 challenge was to have the data on the far right side, I knew I needed to find a lighter colored subject. This histogram could represent a photo of anything but there is definitely some lighter colored objects in the photo since that's where most of the data is.
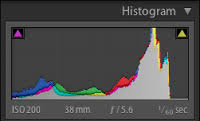
My goal was to have as many light colored objects in the image as possible to keep the data to the right. Blacks are on the far left side of the histogram so I didn't want anything black in the image. Task #1, I needed to find a dog to use as my subject.
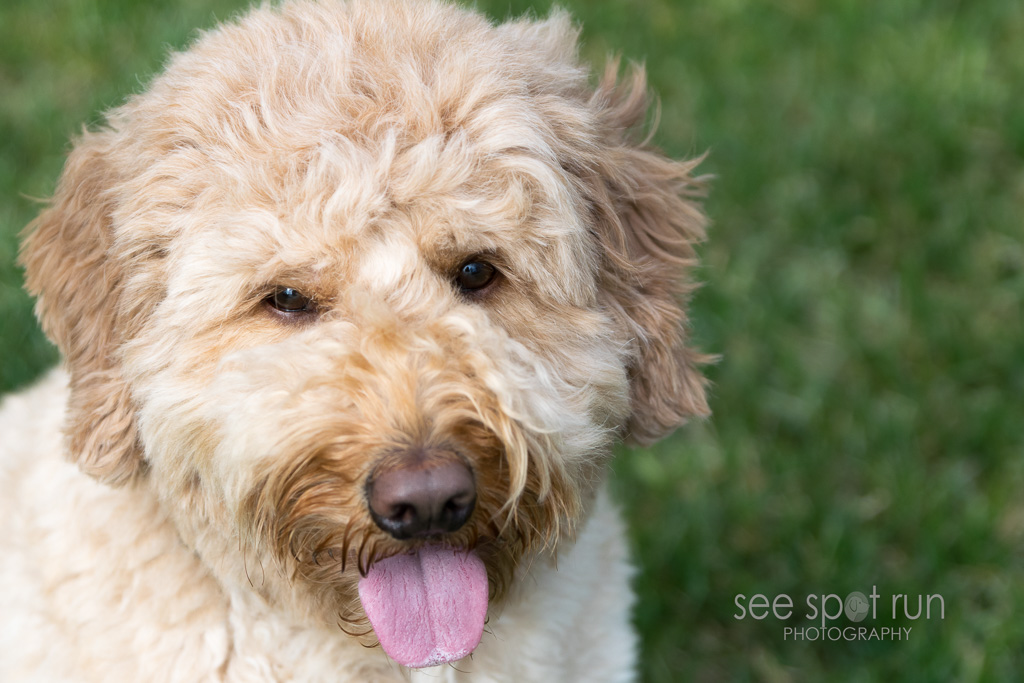
I knew I was going to be walking Bailey today and Bailey is a precious, light tan colored, big-ole-fluff of a golden doodle. Unfortunately my walk with him was going to be around 1pm which is not ideal photo taking time but he is the only light colored dog I was seeing today. My 2nd problem was, I had no assistant to help me (which is frequently an issue I have.) Trying to take photos of dogs without someone to help is REALLY hard. (That's a topic for another discussion though.) After asking his family's permission to use him as my model and after our walk, we went to his backyard.
My initial thought was to have Bailey sit which he does really well if he knows he is going to get a treat. I thought I would position myself on the ground near him and shoot up at him with the sky in the background. It was pretty overcast (which was helpful since it was 1pm). I thought: light tan colored dog + overcast sky = most of the data pushed right. Right? Well, not exactly or at least not exactly when I took the photos. Bailey did great but he really didn't really understand why I so close to him on the ground. He kept wanting to stand up and when he stood up, he'd move around which is not an easy shot to try and take especially for me. (Why does my best assistant have to be 13 years old and in middle school at 1pm on a Monday?) Do I need to mention that at this point I am thinking to myself, " I hope the neighbors aren't watching!"
I moved on to Plan B even though I didn't really have a plan B. I did have an eye doctor appointment in about 30 minutes so I had about 15 more minutes to try and get a shot of him that met the Project 52 assignment. I can snap a lot of pictures in 15 minutes but getting a decent picture in that amount of time is hard and getting a decent image that meets the Project 52 challenge requirement might have proved to be impossible for me. But hey, that's why I'm doing this challenge, right? Chin up... I will strive to do better next week.
LESSONS LEARNED IN PROJECT 52 - WEEK 5: 1. Taking photos of dogs with long hair around their eyes is hard - I couldn't find them! 2. A black nose, black in the background and green grass will show up on the histogram on the far left and in the middle. Not the far right which was the assignment challenge. 3. By cropping a photo of Bailey, I was closer to fulfilling the assignment of creating a photo with most of the data on the right side of the histogram. (The 3rd photo.)
So, here is my effort for Project 52 - week 5.

If I crop this photo and get rid of most of the blacks and greens in the photo, then my histogram data is mainly on the right. :) Trust me on this... I cannot figure out how to copy the histogram here. I know it can be done but apparently not by me.

And lastly, *how long can I call myself a newbie? I am hoping for a very long time because I still have so much to learn.
If I haven't mentioned that I love doing this, I do! The feeling I get when I'm behind the lens photographing a dog is priceless and to discover that at this point in my life is well... life changing. Who knew!
Remember to check out the next photographer's take on this week's assignment and next up is Hoof N Paw Fine Art Photography. I'm excited to read everyone else's posts and see the cute pictures they post (remember this is a pet photography group!) Be sure to continue clicking the links at the bottom of each post. You'll end up right back here at See Spot Run Photography when you're finished.
PS I promise to try and make the next post shorter! Whew... congrats if you made it through this one.